
Your first laser engraver should fit the projects you want to make—not just promise the highest wattage. A small workspace may suit tags and ornaments, while signs and larger batches need more room.
These 10 options span compact diode machines, larger open-frame models, and an enclosed choice. Use the comparisons below to narrow your shortlist by materials, safety needs, and budget.
Best 10 Laser Engraver for Beginners Picks for 2026
Easiest Creative Start

- AI design tools in free desktop software
- 99% preassembled; quick laser-head installation
- Compact 130 × 130mm work area
Best For: First-time makers working on small designs
Compact Starter Pick

- Free ACMER Studio software
- 99% preassembled for quick setup
- 130 × 130mm work area
Best For: Small craft projects and minimal assembly
Roomiest Work Area

- 400 × 400mm work area
- Tool-free focus adjustment
- Stated 10–20 minute assembly
Best For: Larger flat projects and hands-on setup
Flexible Control Pick

- Wi-Fi and TF-card offline control
- 300 × 300mm work area
- Air-assist-ready metal nozzle
Best For: Medium-size projects and flexible controls
Best Enclosed Craft Pick

- Enclosed Class 1 design
- Dual-camera workspace preview
- Printing and rotary add-ons sold separately
Best For: Home crafters seeking camera-assisted placement
Best Quick-Assembly Option

- Five-piece, tool-free assembly design
- 300 x 300 mm work area
- Multiple safety and connection features
Best For: First-time users who prioritize simple setup
Best for Larger Projects
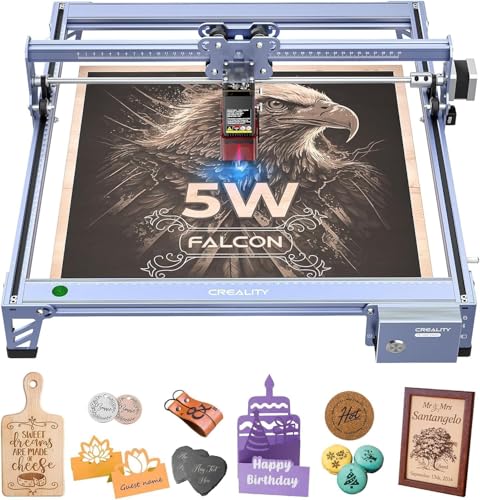
- 400 × 415 mm work area
- Fine 0.06 mm laser spot
- Offline use; rotary sold separately
Best For: Beginners focused on larger engraving projects
Best for Easy Setup
Creality Falcon 10W with Wi-Fi

- Stated 10–20 minute assembly
- Wi-Fi, USB, and SD card transfer
- Tool-free focusing plate
Best For: First-time users who value setup and connection options
Best for Offline Cutting

- 400 × 415 mm work area
- 10W laser output
- SD-card offline operation
Best For: Beginners planning cutting projects without a connected computer
Easiest Creative Start – ACMER S1 3.5W
If you want a laser engraver for beginners that minimizes setup and design work, the ACMER S1 3.5W is a practical pick. It arrives 99% preassembled, and its free desktop software includes AI tools for turning prompts or photos into designs.
Best For: First-time makers creating small, detailed engravings with a quick-start workflow.
Pros:
- Laser head installation is described as a one-minute step.
- 3,500mW diode laser supports engraving and cutting thin materials.
- Works with ACMER Studio, LightBurn, and LaserGRBL.
Cons:
- The 130 × 130mm work area limits project size.
- Its Class 4 laser requires appropriate safety precautions.
The compact work area is the main trade-off. Choose this version over the 2.5W S1 if its higher stated laser power and built-in AI design tools matter to you.
For a laser engraver for beginners with little assembly and a small footprint, consider the ACMER S1 2.5W. It comes 99% preassembled and includes free ACMER Studio software, while also supporting LightBurn and LaserGRBL.
Best For: Beginners engraving small craft pieces who prefer a compact machine and a straightforward setup.
Pros:
- Laser head installation is described as taking about one minute.
- 2,500mW diode laser can engrave various materials and cut thin plywood, MDF, and acrylic.
- Supports Windows, macOS, and Linux.
Cons:
- The 130 × 130mm work area is restrictive for larger pieces.
- Its 2,500mW stated laser power is lower than the 3,500mW S1 version.
This is the smaller-power S1 option for compact projects. If cutting performance is your priority, compare its stated output with the other machines before choosing.
If your search for a laser engraver for beginners starts with project size, the KENTOKTOOL LE400 PRO offers a 400 × 400mm work area. Its all-metal frame takes a stated 10–20 minutes to assemble, and a knob lets you adjust focus without tools.
Best For: New makers who need room for larger flat pieces and don’t mind assembling an open-frame machine.
Pros:
- 400 × 400mm work area accommodates larger designs.
- Tool-free focus knob and axis markings help with setup and positioning.
- Includes a detachable magnetic laser shield and power switch.
Cons:
- Requires 10–20 minutes of assembly rather than arriving nearly assembled.
- At 14.02 pounds, it is less portable than the compact S1 models.
The larger workspace is its clearest advantage. Note that the product lists 5.5W laser output; the “50W” in its title should not be mistaken for optical laser power.
The Twotrees TTS-55 Pro suits someone choosing a laser engraver for beginners who wants more than a basic computer-only workflow. It offers Wi-Fi control, TF-card offline engraving, and a 300 × 300mm working area.
Best For: Beginners who want wireless or offline control and room for medium-size projects.
Pros:
- 5,500mW laser with a metal nozzle designed for adding air assist.
- Supports Wi-Fi, TF-card offline engraving, LaserGRBL, and LightBurn.
- 300 × 300mm work area offers more room than compact starter models.
Cons:
- The notes describe air-assist support, not an included air-assist pump.
- Its stated 0.08 × 0.46mm laser spot is not equally narrow in both directions.
Its control options and air-assist-ready nozzle provide room to experiment as your projects develop. Check which software works with your operating system: the listed LaserGRBL support is for Windows, while LightBurn supports Windows, macOS, and Linux.
Best Enclosed Craft Pick – xTool M2 10W
If you want a laser engraver for beginners that keeps layout straightforward, the xTool M2 pairs a fully enclosed Class 1 design with dual cameras for a live workspace preview. Its included 10W diode laser is suited to craft materials such as wood, leather, felt, and paper.
Best For: Home crafters who want camera-assisted placement and a fully enclosed machine.
Pros:
- Dual cameras help position designs on materials before engraving.
- xTool Studio includes ready-to-use templates and an AI image generator.
- Fully enclosed Class 1 design includes real-time monitoring.
Cons:
- CMYK printing and IR engraving require separately sold modules.
- The RA3 Lite rotary is not included.
The M2 is a strong fit if ease of placement and an enclosed setup matter more to you than having every capability in the box. Budget separately for any printing, IR, or rotary projects.
Best for a Larger Work Area – LONGER Ray5 5W
The LONGER Ray5 gives shoppers seeking a laser engraver for beginners a 400 x 400 mm work area and several ways to send jobs to the machine. Its 3.5-inch touchscreen and TF-card support make offline use practical once you’ve prepared a design.
Best For: Beginners who want room for larger projects and a choice of software and connection methods.
Pros:
- 400 x 400 mm working area accommodates a range of project sizes.
- Supports USB, TF card, Wi-Fi, and app connections.
- Compatible with LaserGRBL and LightBurn.
- Includes emergency shutdown, motion protection, and overheating detection.
Cons:
- Assembly is required, though tools and guides are included.
- Its 5W laser has less stated output power than the 10W xTool M2 in this roundup.
Choose the Ray5 if workspace and workflow flexibility are your priorities. Plan on setting it up and learning your chosen engraving software before starting a project.
Best Quick-Assembly Option – 5.5W Beginner Laser Engraver
If assembly is your main concern when choosing a laser engraver for beginners, this 5.5W model is built around five main pieces and is described as requiring no tools, belt tensioning, or axis calibration. Its 300 x 300 mm working area suits projects on materials including wood, leather, acrylic, glass, and coated metal.
Best For: First-time users who want a quick setup and multiple connection options.
Pros:
- Five-piece modular design is intended for tool-free assembly.
- Protection cover has an open-cover stop; additional features include a flame sensor, emergency stop, safety lock, and tilt pause.
- Supports LightBurn, LaserGRBL, and Cutlabx, plus Wi-Fi, USB, app, and offline TF-card use.
Cons:
- Rotary roller and air assist are described as additions, not included equipment.
- 300 x 300 mm work area is smaller than the LONGER Ray5’s 400 x 400 mm area.
This is the most setup-focused option of the three. Its safety features are useful, but check which accessories your planned projects need before you buy.
Best for Larger Projects – Creality Falcon 5W
If you want a laser engraver for beginners with room to try larger designs, the Creality Falcon 5W offers a 400 × 415 mm work area and supports offline use. Its 5W laser output and fine spot make it a practical choice for learning engraving before taking on more demanding cuts.
Best For: Beginners who prioritize workspace and detailed engraving over cutting power.
Pros:
- 400 × 415 mm work area accommodates larger pieces.
- 0.06 × 0.06 mm laser spot supports fine details.
- Offline use and a motion-triggered stop add convenience and protection.
Cons:
- 5W laser output offers less cutting power than the 10W models in this roundup.
- Rotary roller and risers are sold separately.
The spacious work area is the main draw. Plan for appropriate laser safety measures: the eye-protective cover does not make this Class 4 laser risk-free.
Best for Easy Setup – Creality Falcon 10W with Wi-Fi
For shoppers seeking a laser engraver for beginners, this Creality 10W model pairs a stated 10–20 minute assembly time with a tool-free focusing plate. It supports LaserGRBL as a beginner-oriented software option, while its 10W laser output leaves room to explore cutting projects.
Best For: New users who want straightforward setup and several ways to send designs to the machine.
Pros:
- Tool-free focusing plate simplifies focus adjustment.
- Supports Wi-Fi, USB, and SD card transfers.
- Listed to cut 5 mm basswood or 3 mm black acrylic in one pass.
- Compatible with LaserGRBL and LightBurn.
Cons:
- Its open-frame design calls for a suitable workspace and laser safety precautions.
- One-pass cutting claims apply to specific materials and thicknesses, not every project.
This is a flexible starting point if setup and connection choices matter to you. The module’s UV-filtering acrylic is a safety feature, not a substitute for safe operation.
Best for Offline Cutting – Creality Falcon 10W
This Creality Falcon 10W is a laser engraver for beginners who want to try both engraving and cutting in a 400 × 415 mm work area. It supports SD-card offline operation, so you can run a prepared design without keeping a computer connected.
Best For: Beginners who want a roomy 10W machine with SD-card operation.
Pros:
- 400 × 415 mm work area gives projects room to grow.
- 10W laser output and a 0.06 × 0.06 mm spot support cutting and detailed engraving.
- Supports offline use with an SD card and one-button control.
- Includes goggles and a UV-filtering module cover.
Cons:
- Material-specific cutting claims should not be assumed to apply to every type of wood or acrylic.
- The module cover and included goggles do not eliminate the need for laser safety precautions.
Choose this version if offline operation and a generous workspace are priorities. Check settings against your actual material before relying on the listed one-pass cutting claims.
How We Picked the Best Laser Engraver for Beginners
We compared the listed machines on advertised laser output, working area, enclosure design, controls, and features that can simplify first projects. We also weighed practical costs, including ventilation and accessories. Manufacturer specifications are a starting point, not a guarantee of cutting depth, engraving speed, or ease of setup; results depend on the material, settings, and number of passes.
Quick Comparison
For small projects: The ACMER S1 2500mW and 3500mW models are worth considering if your planned work fits their available workspace. For more layout room: The LE400PRO lists a 400 × 400 mm work area, while the generic 5.5W beginner model lists 300 × 300 mm. For straightforward controls: The LONGER Ray5 5W advertises a touchscreen and offline use. For an enclosure: The xTool M2 10W is listed as a Class 1 enclosed machine with dual cameras. The Twotrees TTS-55 Pro and the Creality 5W and 10W models round out the open-frame choices.
Check each exact listing before buying. In particular, distinguish laser optical output from a machine’s input or total power rating: a “50W” or “72W” figure does not necessarily describe the beam’s output.
Key Buying Factors for a Laser Engraver for Beginners
Materials and Output Power
Start with what you will engrave most often. Wood, leather, and some opaque acrylics are common diode-laser projects, but compatibility varies by color, coating, and laser wavelength. Clear acrylic and bare metal generally call for different expectations or equipment. A 5W-class diode can be a sensible entry point for engraving; a 10W-class diode may offer more cutting capability, though material thickness and finish still matter.
Workspace, Software, and Controls
Choose a working area large enough for your biggest intended piece, with space to position it securely. Before ordering, confirm your computer and design software are supported, whether software or subscriptions add cost, and whether the machine can run offline if that matters to you. Camera alignment and touchscreens can be convenient, but they do not replace a manageable setup process.
Safety and Total Cost
Open-frame lasers require particular attention to eye protection, access control, smoke extraction, and fire prevention. An enclosure can help contain access and fumes, but you still need appropriate ventilation and must follow the maker’s operating instructions. Never leave a job unattended. Budget for a suitable work surface, exhaust equipment, replacement consumables, and any accessories your projects require. Never laser-cut PVC or unidentified plastics; hazardous fumes can result.
Who Should Buy Which Laser Engraver for Beginners?
Choose a lower-power ACMER S1 if you want to start with small engravings and your materials match its stated capabilities. Look at the LE400PRO or other larger-bed options if project dimensions are your main constraint. Consider the Ray5 if onboard controls and offline operation appeal to you, or the xTool M2 if an enclosed design and camera positioning justify the added expense. Compare the Twotrees and Creality 5W or 10W listings if you are comfortable planning an open-frame safety setup and want to choose between engraving-focused and more cutting-oriented output. Whatever you pick, verify the exact model’s optical power, bed size, software support, and safety provisions before checkout.